Back in the 1980’s when we built our log house, we were somewhat restricted in the size of our house because we were building with logs. We also didn’t feel like we needed a very big home. A bigger house just meant more space to heat and keep clean, plus we didn’t have much cash for building materials and we were unwilling to borrow money for our project. Although I wanted a bathroom, it has always seemed uncivilized to me to have a commode inside, and we were pretty happy with our outhouse. Most folks, though, for some reason, seem to want their commode inside the house. As we get older we have come to grips with the fact that someday someone else is going to be living in this house, and chances are they will want to defecate indoors (sounds disgusting, doesn’t it?).
I realized that the next occupant of this place will tack a bathroom on our log house—probably something that looks like an addition, most likely a frame room stuck on the side of our house. To keep myself from rolling in my grave when that happened, I decided to build a log addition that would look like it belonged with the rest of the house. While we were at it we thought we would build a bigger bedroom with good cross-ventilation and a sleeping porch. The plan we came up with would be a 20X24-foot log pen on the North side of our house, divided into a 12X20 bedroom and a 8X14 bathroom with a tiled shower, a vanity, and an actual flush commode!
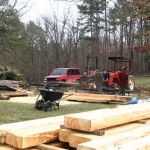
In December of 2008 I cut the timber for our logs, borrowed a portable sawmill and milled the logs that we would need. The mill I borrowed wouldn’t cut the longest logs, which were 24 feet six inches long, so I hauled these logs to my friend Gary’s mill and we cut them there.
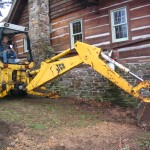
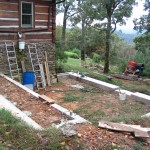
Once the logs were milled, stacked and drying, I borrowed a backhoe and dug the hole for the foundation and cellar. This I did in January of 2009,
intending to build the foundation that summer. My plans were changed by the Great Ice Storm (see related article in this blog). We did get the footing poured that summer, but because of the ice storm cleanup it would be a year before the foundation would get built. This project was delayed until the spring of 2010. We wanted
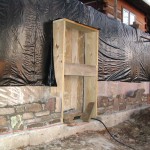
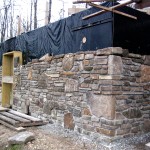
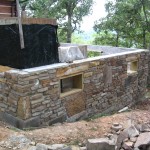
to lay up a stone foundation, so we used the same backformed masonary technique we used when we built the house. This involves building a straight and plumb plywood form, laying the stone so each rock face is 12 inches from the form, then filling in behind each course of rock with concrete and reinforcing wire. Maria would pick the
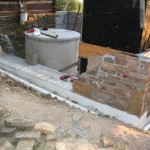
stone, Austin would mix the mortar or concrete, and I would lay in the mortar and stone. Most nights I’d be out there about ten o’clock with a flashlight finishing the joints. Before we finished the front wall we set a 1000 gallon cistern in the hole. This doubled our water storage and hopefully would
prevent us from ever hauling water again. We finished the foundation in early November, just about the time the weather
got too cold to do rockwork.
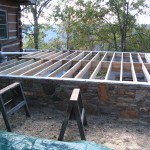
In the spring of 2011 Austin and I set the oak beams that span the basement, and I put in the joists and subfloor so we would
have a platform for raising the logs. We started up with the walls on the first of June, which also was the day that it got really hot, and stayed that way for the rest of the summer.
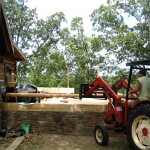
I would load several logs on my trailer and pull it into the drive-through in our barn so I could do my notching in the shade. Once I had a log dovetailed, I would pull the trailer out and move the log to my 12-inch joiner, which is powered by my 1939 Allis Chalmers tractor via flat belt. A couple of passes would plane the log down to clean wood. Then I would pick the log up with the forks
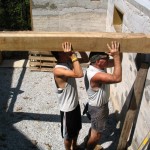
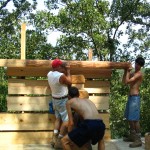
on the front-end loader of my Belarus tractor and move it to the building site’ where the boys and I would wrestle it into place. Then
back to the barn to lay out another notch. Austin and Jed were a great help to me that summer. I don’t know how I could have done it without them.
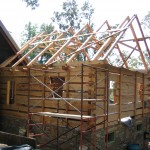
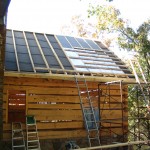
By the first of September the walls were up. Next came the pole joists and rafters, then the 2X6 tongue and groove roof decking. Full size 2X4’s set on edge made
a space for the 3” foam insulation, then 1X4 lath across the 2X4’s and finally, towards the end of October, the metal roof went on. “Let it rain”, says I—“we have a roof!” It had
been a long, hot summer but we finally had something that looked like an addition to our home. A good coating of redwood-stained CWF brought the logs to nearly the same color as our original house.
The winter was spent siding the gable ends, finishing the sleeping porch deck and adding soffits, gutters and downspouts. In the spring I began the challenging job of chinking the exterior. This involved cutting plasterers’ lath (expanded metal also known as “blood lath” because it is very sharp, and shreds your fingers) to fit the space where the chinking will go. After it is stapled in place it is filled with a mortar mixture, then worked to the right shape with a small trowel. That summer I planed down a bunch of the side lumber that came off the logs when I milled them and made tongue and groove paneling for the inside gable end above the north bedroom wall. Lately we put in the ceiling for what will be our bathroom and are now adding a ½-inch subfloor to the existing ¾-inch subfloor so that the finish ¾-inch flooring will be the same height as the floor of the house. Next I will frame the wall that will divide the two rooms and start the plumbing and electrical work.
After I wrote that last paragraph a lot has happened. . Through the winter of 2012/13 I framed the wall between the bedroom and bathroom and put in all the plumbing for the bathroom. My buddy Frank graciously volunteered his time as an electrician, so we got the whole thing wired. Through the summer I insulated the cracks between the logs (outside chinking was done) with that expandable foam in a can. It took a couple of cases but this method really makes a tight seal between the logs so no air can infiltrate the chinking. Then came the whole chinking thing again, this time on the inside.
While all this was going on, Maria was working her magic with tile in the bathroom. I built a curb with rounded edges out of treated lumber and she laid a beautiful mosaic scene on the shower floor, then went up the back of the shower with a scene of cat tails, reeds, a duck, and more. When the shower was finished and the interior wall was sheet rocked and painted, I trimmed the interior windows and doors with ash lumber that I’ve been saving for years. It is from the tree that fell on the Hogan back in ’08 or so. I milled the lumber back then, all I had to do now was dig it out of the stack and plane it to size. I also used the ash to build a cabinet to go under the bathroom sink.
By now it was late July of 2013. We decided to blow off our planned vacation (again) and finish the addition enough so we could move in. Rather than make my flooring from scratch like I did on the house, I actually bought finished ash flooring from a place in Melbourne. It took a few days to nail it down but boy does it look great! A few more days installing baseboard and trim and we were ready to move in. What a difference from our old stuffy bedroom. The new one is big and airy and soooooo comfortable. We love it, and we also love our nice spacious shower and Maria REALLY loves that flush commode!

Dave and Maria, I had a large time visiting w’ya’ll. Sara really liked her necklace and looks foward to coming up to visit this summer.The website is Great and interesting. NUTNBUTLUV for all your family!! Dave you can look at our inventory thru our website and another one we advertise in is http://www.tractorhouse.com